Tuesday, October 26, 2010

Lauren Conrad Style Guide

Lauren Conrad, TV personality and favorite fashionista for girls and women alike. In her book Style, she shows you how to create looks you'll love and a wardrobe to be admired, all with the experience she has learned over the course of five years. This book is great for beginners to fashion with tips on how to do makeup, hair, and constructing a basic wardrobe and the basics of almost every fashion piece. Don't miss out on getting this helpful guide whether you are a beginner or advanced fashionista.

Stay Fabulous,
Disastrous Beauty

Statement Necklace Tutorial

As promised here is the other version of the faux fur statement necklace I made about a week ago. This one is more focused on the beading rather than on the fur itself. It is also a lot easier since I glued the beads on this time rather than sewing them on. Here is what you'll need:
Felt: I used a cobalt blue color. This is only going to be used as a background so color shouldn't overly matter.
Assorted beads: I used a variety of seed beads and medium sized beads for this one.
Main beads (optional): I used silver stars for mine since my theme was constellations.
Glue: Whether its fabric or hot glue use whatever you feel comfortable with. I used hot glue.
Paper and scissors: To sketch out your design like below.
Ribbon: To tie it all together. I used a contrasting color which in this case was black.


Step 1:
Sketch out your design on a piece of paper, modifying it until you get it where you want. Cut it out.
Step 2:
Pin the paper to the felt and cut it out. You may need to use fabric scissors for this.

Step 3:
Glue on your main beads which happened to be the stars for me. There is no particular pattern for where you need to glue them, just wherever you like.

Step 4:
If you are working with hot glue you're going to have to work in small sections at a time. Glue them in batches, quickly, before the glue dries out.


Step 5:
Finish gluing them all on, taking your time and pressing them down during each gluing to insure that they stay in place.


Just glue the ribbon onto the back corners and you are finished. From my experience of doing this necklace I wouldn't recommend using seed beads unless you have loads of time and patience. They definitely tried mine!
Stay Fabulous,
Disastrous Beauty


1 Shirt, 7 Outfits, 7 Days: Friday


Today is usually my errand day so I don't go all out on my style meter. To keep it casual I used some yoga pants from this cute boutique store I found (Victoria's Secret has some great ones). I don't wear sneakers unless I am working out so instead I used my ballet flats from the first revamp I did. I also don't wear much makeup when I go out for errands and I put my hair into a ponytail to keep it out of the way. You could also use this outfit for working out and just switch the shoes for sneakers.
Stay Fabulous,
Disastrous Beauty

1 Shirt, 7 Outfits, 7 Days: Thursday


Tonight grab your purse and your date because its date night! I love looking really pretty on a date and so heels are actually a must for me but it all kind of depends on where you are going. Since its winter I incorporated my coat into the look (Victoria's Secret). I don't know if its still available or not. I used a flowing silk skirt that had pink flowers on it like the shirt. I did a more muted red lip and brown eyeshadow for my makeup. A good tip though is to keep your eyeshadow muted if you are wearing red lipstick so as not to compete with each other. Go all out and look super fabulous tonight.
Stay Fabulous & Warm,
Disastrous Beauty

1 Shirt, 7 Outfits, 7 Days: Wednesday


First off I want to send out an apology for not posting on time the last few days. Been really busy :( Any who...
Today is sight seeing day! I decided to keep the look casual so I picked out my most comfortable jeans and shoes (Sketchers) and I used my cloche hat. I originally got it from Forever21. I borrowed my sisters black crocodile print bag to complete the look. I kept my face pretty bare as far as makeup goes for this look. The key when your sight seeing is to stay comfy and simple since your plan is to do a lot of walking.
Stay Fabulous,
Disastrous Beauty


1 Shirt, 7 Outfits, 7 Days: Tuesday


Today's theme is lunch with friends, using the same Charlotte Russe shirt from yesterday as a base for the whole outfit. Grey goes stunningly with pink so I used it multiple times within the outfit. I used a ruffly Charlotte Russe scarf and a knitted, draped, grey shawl that is also from Charlotte Russe (It is no longer available though). A simple charm necklace adds some jewelry without distracting from the essence and warmness of the knits. I used flat heeled grey boots from Payless for my shoes and black Victoria's Secret Siren Jean Jeggings for pants.
For makeup I went with a more toned down look and kept it in the same grey palette as most of the outfit. Check back tomorrow for yet another look.
Stay Fabulous,
Disastrous Beauty

1 Shirt, 7 Outfits, 7 Days: Monday

I decided to start a new series that will last all this week. I am going to make seven outfits all based around the shirt that I am wearing in the picture above. Truth be told no one is going to wear the same shirt seven days in a row but I am just trying to show you seven different ways to use it.
For Monday, since its the kick off of a work week, I decided to use that as the theme. The shirt, which I got from Charlotte Russe, paired with a simple pencil skirt - look at my first tutorial on how to make one - makes it dressier and I had a pair of American Eagle ballet flats that matched great with the skirt color. I would usually use heels but I didn't have any in a color I liked. For the accessories I used a Charlotte Russe handbag and a multi-layered pearl necklace. I kept my hair up and away from my face and for my eyes I used Cover Girl's Smoky Shadow Blast in Purple Plume. Overall it is a very professional look that works great for the office. Come back tomorrow for another look using the shirt!

Stay Fabulous,
Disastrous Beauty

Monday, October 25, 2010

Faux Fur Statement Necklace Tutorial

This season faux fur has come back with a vengeance. You see it everywhere and on everything. I am totally obsessed with it because it is so luxurious and I don't have to feel bad about wearing actual dead animals :(
So lets get started on making a totally awesome necklace! (Sorry if the pictures aren't that great, my camera isn't that great)
What you need:
Faux Fur - I used a piece of craft fur since I couldn't find actual fabric I liked.
Ribbon - I used black to match my fur but hey it isn't called a statement necklace for nothing!
Assorted Beads - I used pearls and emerald beads because I liked the contrast of colors.
Needle and Thread - It is best to use thread the same color as the fur.
Piece of paper - You will need to use it as a pattern.
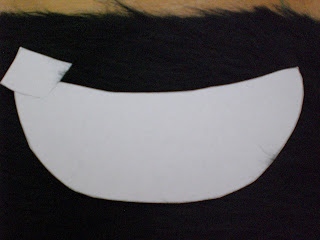
Step 1:
You will need to draw your necklace design on a piece of paper and then cut it out. I pinned the paper onto the fur so it wouldn't move when I was trying to cut it.
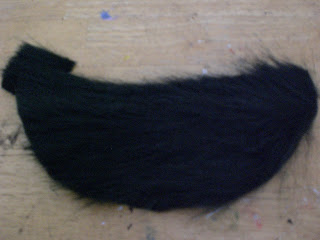
Step 2:
Cut it out to your shape and then you will want to brush it. It shed quite a bit on me :)


Step 3:
Start sewing on your beads. Sewing them on ensures that the likely chance of you walking down the street and them falling off is slim. You don't want to get home and discover your hard work is half missing. If you don't know how to sew them on then follow these easy steps:
1: Knot your thread near the end of the string. Do this a couple of times.
2: Insert the un-knotted end of the thread into the needle's "eye" or hole. Leave a little extra hanging so you don't have to constantly keep re-threading.
3: Start at the back of the fur and pick the best place to start from. Go up through the fur and pull tightly so the knot gets stuck at the back.
4: Thread the bead onto the needle and insert the needle back into the fabric, pulling tightly. Repeat steps 3 & 4 until you get near the end.
5: When you get near the end and you need a new string you need to knot it off so it stays put. Make sure the needle is at the back of the fabric. Insert the needle just through the top layer of the backing and pull partly through, leaving a loop. Insert the needle through the leftover loop and pull tightly. This is knotting it off. Repeat a couple more times.


Step 4:
Using your design, sew all your beads into position. I forgot a picture of me sewing on the pearl beads :( As you can see I decided to do a little diamond shape at the top, I covered that part with beads and only the middle of the main part with beads.


Step 5:
Ta Da! You can see I sewed the rest of the beads around the emerald ones. You can add more or less beads as you wish and totally mix it up. You can even do a different shape if you wanted.
Stay tuned because I am going to show you how to make another type of statement necklace soon.
Stay Fabulous,
Disastrous Beauty


Saturday, October 9, 2010

Outfit of the Week: Goddess

I absolutely love this dress! I found this only yesterday at one of my new favorite online stores. The maxi dress has been a favorite staple of mine for a couple of years now but this one tops them all. I love the elegance of it and how it just seems to give off an earthy goddess look. Kind of like Gaia. Also the bracelet looks very goddess. Don't hesitate to buy this dress and be the envy of all the goddess and all your friends. (I wouldn't wear the dress with too much jewelry so as not to take away from it. It is also best to stay in the warm and earthy color palette)

Dress: Demeter Maxi Dress - Modcloth - $60
Shoes: Gladiator Heels - Forever21 - $27
Bracelet: Aztec Bracelet - Forever21 - $6.80
Earrings: Disc Earrings - Forever21 - $3.80

Stay Fabulous,
Disastrous Beauty

Friday, October 8, 2010

Black Lace Bangle Tutorial

So recently I saw this really cute lace bangle in a magazine for......$400! There is no way that I am paying $400 for something that costs like $12 to make. So presenting the black lace bangle tutorial! Below is a list of things you will need:
Bangle - I used a clear one but a white one is better. Any color would work though.
Black lace fabric - Not trimming lace but fabric lace. Most likely in the bridal section of your fabric store.
Hot glue - You could other glue if you don't have this but it takes a lot of patience ;)

Step 1:
First cut the fabric to size, making sure that there is enough extra to fold and glue inside the bangle.
Step 2:
Start with the bottom part first, folding it in and glue it as quickly as possible if you are using hot glue. Then start folding in the top making sure you pull it tight so there isn't any extra hanging off.

Step 3:
Go off and proudly flaunt your new bracelet.


Stay Fabulous,
Disastrous Beauty